DIY Sharpie Mug Craft for Seniors
Make a personalized DIY Sharpie Mug – Alzheimer’s & Dementia Activity
This easy, senior-friendly craft is perfect for individuals and groups.
Have you seen the cute Sharpie mugs all over Pinterest? Well, it turns out this super simple craft is a fantastic activity for seniors! My mom (stage 5 Alzheimer’s) had a blast with this project. Her mugs turned out great (which is still really important to her)! And I love this craft because she can make multiples and still feel like there is “purpose to the project” (also still really important to her).
This page contains affiliate links (which means if you make a purchase after clicking a link I will earn a small commission but it won’t cost you a penny more). I only share things I love and would recommend to my best friend. Click here to read my full disclosure policy.
Here’s what you need.
DIY Sharpie Mug Craft Materials
- Mugs – Cheap Dollar Store mugs are recommended
- Rubbing alcohol
- Cotton balls or paper towels
- Q-tips
- Sharpie Oil-Based Paint Markers – We used medium point pens in colors and metallics.
- Stickers – Your choice! We used these letter stickers from Michael’s.
- Painter’s tape or masking tape
- Cookie Sheet
- Oven
- DIY Sharpie Mug printable material list and instructions (available in my Resource Library)
How to make a DIY Sharpie Mug
STEP 1 – Choose your mug, Sharpies, and design
Mugs – Dollar Store mugs come highly recommended for this project by many experienced crafters. My research (reading dozens of Sharpie mug tutorials) suggests that cheaper mugs with less coating work best, and this makes Dollar Store mugs perfect. The paint can have trouble adhering to super shiny high-quality mugs. Go cheap.

Sharpies – DON’T use regular Sharpies or Sharpie water-based markers. The design will not last. Instead, get oil-based Sharpie Paint Markers. We used medium point markers. These worked well for my mom.

Design – Stickers work great for this! Choose a letter to make a monogrammed mug, a word, or a shape. Or use masking tape to create an original design!

Step 2 – Prepare your mug
Wash your mug and then prepare the area you plan to Sharpieify by cleaning it with a cotton ball (or paper towel) and alcohol. Cleaning the mug with alcohol will remove oils from your hands and help the paint adhere.

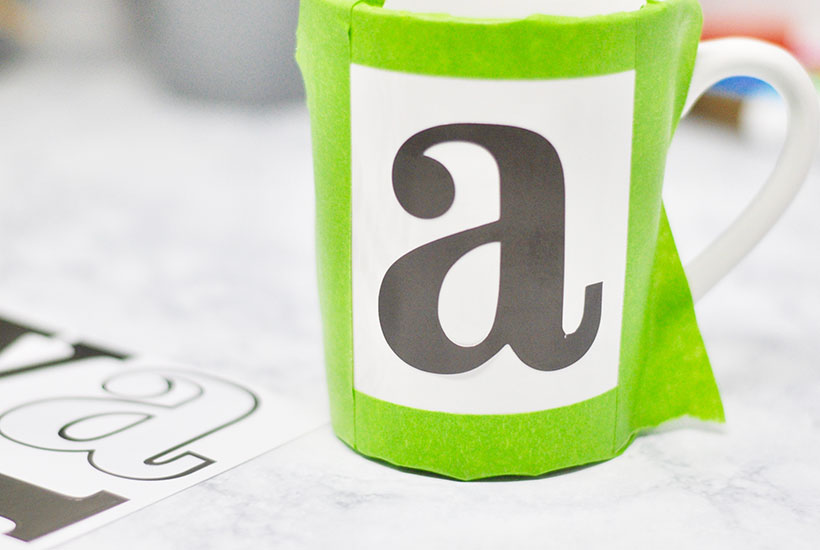
Place the stickers or tape for your design in the prepared area. Make sure your sticker or tape is pressed tightly around all the edges. I cleaned around the sticker with alcohol again after I pressed it on.

If your senior needs a little more help keeping their design neat, tape off the area. This ensures success for seniors who are still concerned with the product!
Step 3 – Create!
If your markers are new, you will have to prime them before the first use by pressing them on a paper towel or piece of paper until the end fills with paint. This is easy to do, but your senior might need some help realizing they need to do this. Mine did.

Choose your colors and start making dots ( or anything else you desire) around your stickers or taped off design. Be sure to fill in closely around the edges. Use one color at a time and allow a few minutes between colors for drying.

When you’re done and your paint it dries, remove the stickers and/or tape!

If any paint seeped under your sticker or if there is a mistake, use a Q-tip and alcohol to remove it. Your senior might need a little help with this step.

STEP 4 – Bake
Let your mug dry for at least 24 hours; then place it on a cookie sheet in a cold oven. Bake at 375 degrees for 1 hour. Turn off the oven and allow the mug to cool inside.

STEP 5 – Hand wash
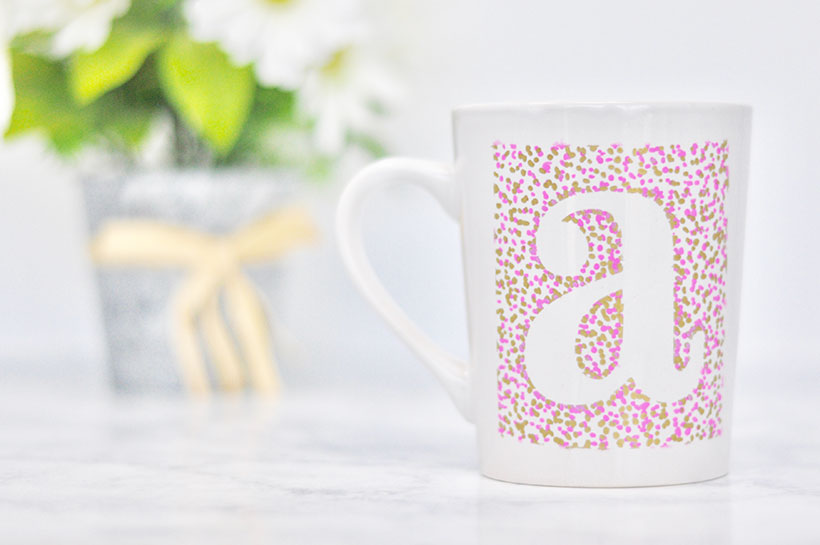
Baking can cause the colors to darken a bit. I noticed it more with the purple than the pink, but I think both mugs still had great color even after baking. Handwashing is recommended.

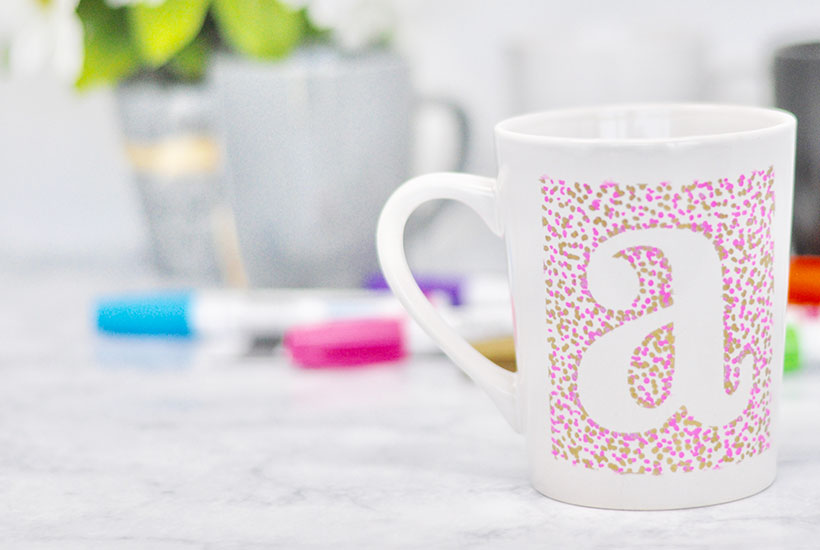
This was such a fun project! With some assistance, this craft is Alzheimer’s and dementia friendly for those in the early to early-mid stages. Encourage your senior to create mugs for themselves and as gifts!
Get the Printable
Would you like to do this project with your senior or with a group? My resource library has the materials list and step by step instructions in a convenient pdf printable. Get the password to my free resource library of Alzheimer’s activities and caregiver resources when you subscribe to my weekly newsletter list! Fill out the form below for instant access! (If you’re already a subscriber, the password to the library is at the bottom of every email I send.)
More Sharpie Mug Ideas
Matching mug sets
Personalized mugs
Holiday-themed mugs
Team-themed mugs
WANT TO REMEMBER THIS?
SAVE THE DIY SHARPIE MUG CRAFT ALZHEIMER’S ACTIVITY TO YOUR FAVORITE PINTEREST BOARD!
Need more Alzheimer’s activity ideas? See our huge list HERE!






Hello,
this is an amazing craft. I was wondering have you tried this with a metal water bottle, such as a hydroflask? Just wanted to see how I can bake the paint marker on the bottle without having to put it in the oven, I’m not sure if that can be done.